Quick Start RStudio
RStudio allows us to create a project associated with a given folder/directory to bundle everything together. It is through an RStudio Project that RStudio gets its Git integration, so projects can be used to version control any file within the associated directory. RStudio is able to connect to remote repositories on platforms such as GitHub, so the command line is not necessary to “push” or “pull” code from there.
- Set up R Project
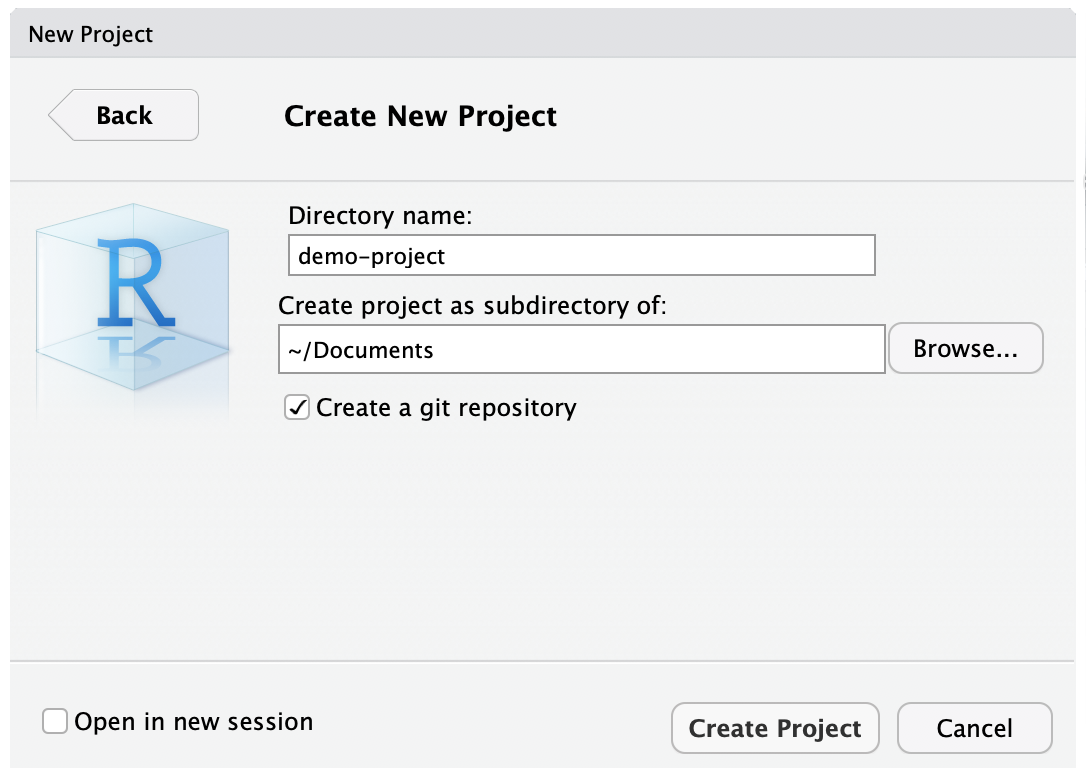
- New Project - any time you do any work that requires code, you should create an R project. This keeps your work together, separates settings for different projects, and allows the use of version control. To do that, go to File in the menu bar and select “New Project”. In the window that appears, name your project, choose a folder/directory for where to store it, and ensure “Create a Git repository” is selected.
Existing Project - if you have already started working on an R Project without initialising Git, you can start using it at any point (the earlier the better). On an existing R Project go to Tools > Project Options > Git/SVN > and select “Git” in the version control drop down. This will ask if you want to initialise a repo, click “yes”. To use the terminal/command line, go to: Tools > Terminal > New Terminal, in that panel type
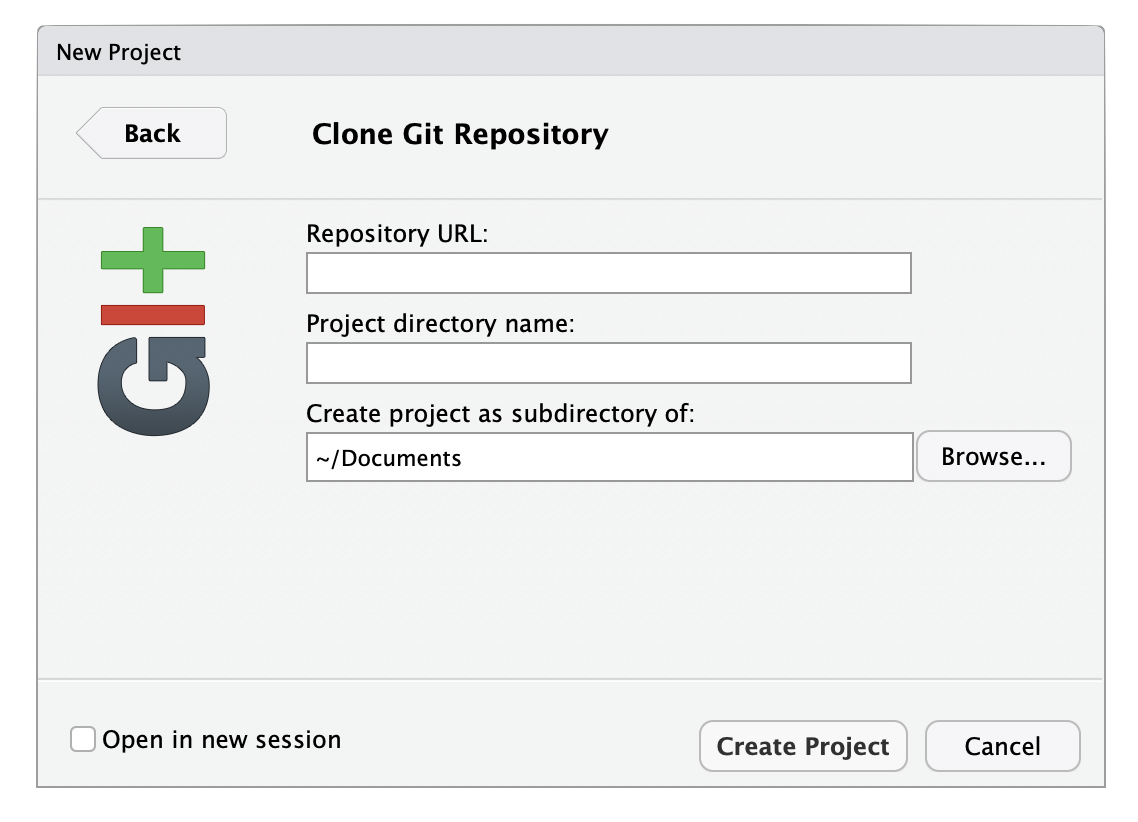
git init.Existing Remote Repo - if you’re going to be working on a project that already exists on a remote repository (e.g. a GitHub project), you can link to this/clone it through RStudio too. Go to File > New Project > Version Control > Git and enter the details in the screen that follows (this will create a folder with a copy of any contents that were in the GitHub repository).
- Repository URL: Using SSH, this guide’s link is: “git@github.com:Public-Health-Scotland/git-guide.git”.
- Project directory name: this is up to you and will be used to name the folder/directory that contains a copy of the repo. Give it any meaningful name, for example this guide is named “git-guide”, the same name as on the remote repo.
- Create project as subdirectory of: this is the location of where the folder/directory that contains the copy of the repo will be stored.
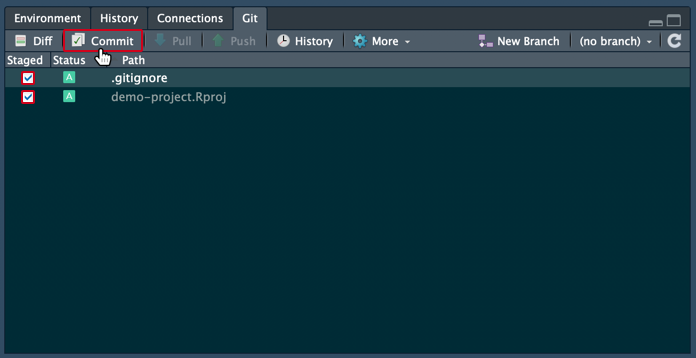
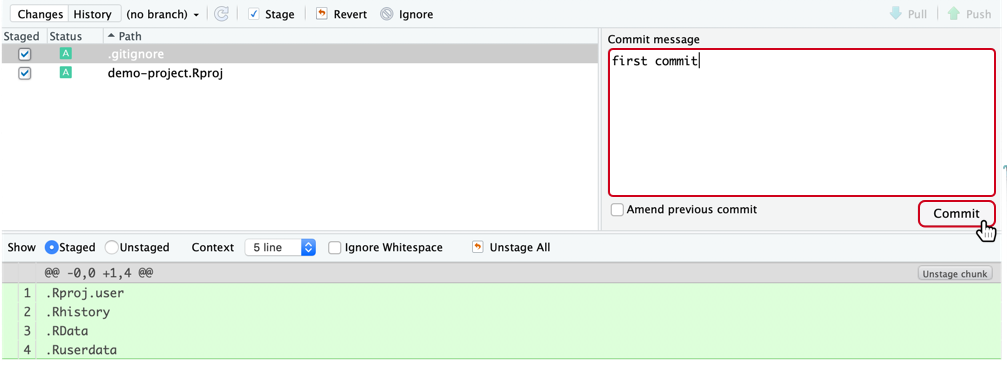
- Change, stage… - RStudio will keep track of all changes made to the files within your R project (not just R files). Any changes made will show up in the “Git” tab, which can be found in the same pane as the R environment. This is typically the top-right pane, but their positions can be changed so it may not be in all cases. When you’re ready to commit, save the files you’re working with and stage them by ticking the box to the left of the files in the Git pane, and then click on the “Commit” button.
- Commit - After clicking on “Commit”, a window will appear with the changes made for review and a prompt for a “Commit message”. Your commit message should describe the changes made and be concise, meaningful and written in imperative mood. Then, just click on “Commit”! This has saved all the changes to the project. Going forward, it will be possible to look back and see the full history of changes to the project, who made those changes, and revert to previous versions where necessary.
- Branching - As part of the recommended workflow, you should use branches to develop individual features, this means that you can edit files but keep an original to revert back to if required. Additionally, when team working, it allows for people to work on different things in parallel. This can help improve efficiency as people don’t have to wait for others to finish what they’re doing before starting something else.
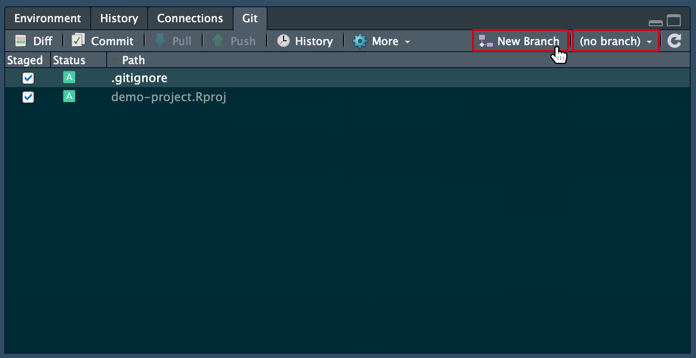
- New Branch - To create a new branch in RStudio, just click the “New Branch” button in the Git pane and give it a name. To switch between branches, click the drop down to the right of the “New Branch” button and click the name of the branch you want to switch to. (When you select a branch, the state of the files in that branch will appear in both the Files pane in RStudio, and in your computer’s file explorer.)
- Merge Branches - When the working branch should be merged back to the main branch, this must be done on the command line as there is no way to do this using the GUI. This can be accessed from the “More” menu in the Git pane and selecting “Shell” or in the RStudio Terminal window. Once you’re in either of these, enter the command
git merge <branch>.
username@PHS000000  ~/Documents/demo-project  (main)
$ git merge <branch>
Link to GitHub - If this is a new project, it won’t be linked to GitHub yet. See Quick Start GitHub for instructions on how to set up a repo on GitHub. RStudio currently doesn’t have a GUI option for this and must be done on the command line. As above, this can be accessed from the “More” menu in the Git pane and selecting “Shell” or in the RStudio Terminal window. Once you’re in either of these, enter the command
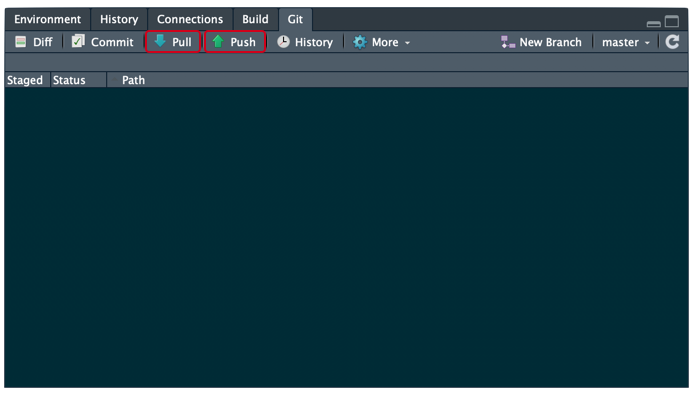
git remote add <name> <url>(<name>is any name to refer to the GitHub connection butoriginis the most common/preferred name to use), pulling in any changes that have been made on GitHub in the meantime usinggit pull <name> <branch>and then finally sending the changes to GitHub usinggit push <name> <branch>.Pull and push - After linking the project to a GitHub repository, RStudio has a GUI interface for pulling and pushing changes. It’s good practice to pull from GitHub to check for changes that have occurred since the last time and to help avoid merge conflicts. After that you can click push to send all your commits to GitHub, now everything is in-sync again.
